Hi friends! Just now, I made a word mozaic in the Image Chef.com! Hey, if you want to make one too, click here!
Look at mine!

Wow! Full of flowers! Do u know what's the phrase written in the mozaic? The phrase is: Princess Charlotte. Cute, huh?

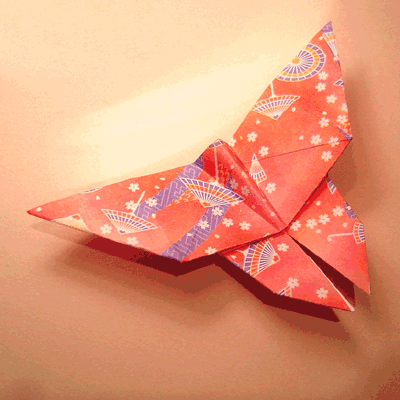
 |  |  |
| 1. Start with your paper white side up. Fold in half, open, then fold in half the other way. | 2. Now Fold the Paper in half diagonally, both ways. | 3. Fold all four corners into the centre and crease well. |
 |  |
| 4. Turn Over and Fold all four corners into the centre again. | 5. Open out the model so far. Your creases should look like this. It looks complicated, but dont worry! |
 |  |
| 6. Fold the outside edges into the centre line. | 7. Holding each inside edge from the point at the centre, bring these edges out to the points shown. Then, fold the top edge downwards and flatten. |
 |
| 8. Rotate the model, and repeat step 7. |
 |  |  |
| 9. Fold the top half backwards and flatten. | 10. Fold down the front outside corners. | 11. Fold these outside corners inward as shown. |
 |  |  |
| 12. Fold the butterfly in half. | 13. Now fold the top layer backwards, at the angle shown. | 14. And now fold the back wing backwards also at the same angle |
 |  |
| 15. Open out. | Your butterfly is complete! |
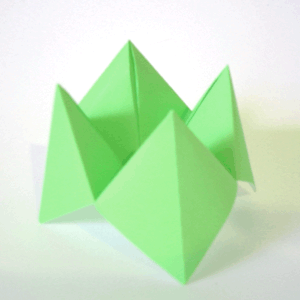
 |  | |
1. Start with white side up. Fold diagonally in both directions. | 2. Fold each corner into the centre point. |
 |  | |
3. Turn over and again fold each corner into the centre point. | 4. Fold in half along creases shown, both ways, and open. |
 |  | |
5. Number each segment from 1-8. | 6. Open up each flap and write a fortune in each segment. Below are some examples of fortunes you can write, but you can also make up your own. |
 |  | |
7. Turn the model over and write a colour on each flap as shown. | Finished Fortune Teller. Use your fingers to open it up. |
 | ||
The fortune teller in action. Move your fingers together one way and then the next. To tell someone's fortune: Get them to pick a colour from the colours written on the fortune teller. If it is blue, spell out B L U E, while moving the fortune teller 4 times (the number of letters in Blue) Now get the person to choose one of the numbers that are shown in the centre of the fortune teller when you finish spelling out the colour. Let's say it is 3. You would move the fortune teller 3 times. Then the person should choose a number from the ones showing this time. Whichever number they choose, lift up the flat and that is their fortune. Source: http://www.origami-fun.com/origami-fortune-teller.html |

 |  |
| 1. Start with a strip of paper. Tie a “knot” in the end of your paper. | 2. Pull gently to tighten, then flatten. |
 |  |
| 3. Fold the end of the strip down and tuck it into the knot. You can cut a bit of it off if it's too long. | 4. Now wrap the other end of the strip around and around this pentagon you have formed, creasing gently as you go. |
 |  |
| 5. Keep wrapping until you get to the end of the strip. Tuck the last bit of the strip into the pouch. You should be left with a cute little pentagon. | 6. Now to make this little pentagon into a star, very gently and slowly use your fingernail to press on the centre of each of its edges. The star should puff out. |
 |
| And you should have a lovely little lucky star! It may take some practise to get the star to puff out perfectly, but stick with it... you’ll get it! If you are having a lot of trouble, try different papers, or try wrapping the strip of paper around without creasing it too much. This helps a bit! Source: http://www.origami-fun.com/origami-lucky-star.html |


 First, prepare a large box of cereal (so magazines and newspapers are fit to it), a pencil, a scissor, a tape, and some wrap papers. Trace the box like the shape of the image shown. Then cut the box from the top of the box (not upside down) to the end of the traced line.


